EATON Easy700 Series Programmable Relays
Eaton Easy 700 Series programmable relays are used in lighting control, HVAC, pump & motor control and automation of small machines & processes.
Filter
 A
A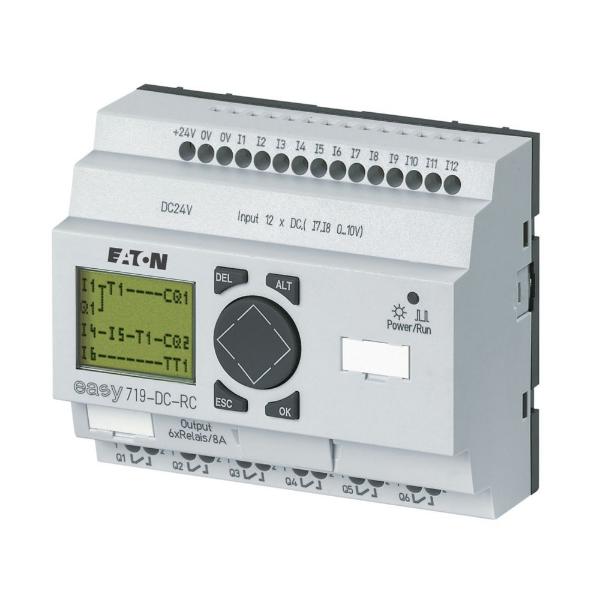 B
B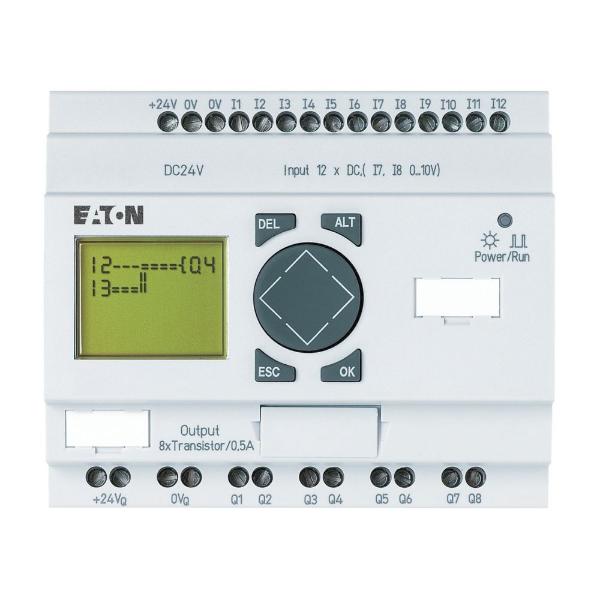 C
C| Style | Model | Type | Voltage | Mounting | |
|---|---|---|---|---|---|
| A | EASY620-DC-TE | 20 I/O Expansion | 24V DC | Top Hat Rail | RFQ
|
| B | EASY719-DC-RC | Series 700 | 24V DC | - | RFQ
|
| C | EASY719-DA-RC | Series 700 | 12V DC | - | RFQ
|
| C | EASY719-AC-RCX | Series 700 | 110-240V DC | - | RFQ
|
Features
- Eaton Easy 700-series programmable relays feature a compact and modular design for ease of installation and expansion.
- These relays come equipped with integrated digital and analogue inputs & outputs for flexible control options.
- They have built-in clock and calendar functions to enable time-based control applications.
- These relays offer a user-friendly programming interface that supports ladder logic and function block diagrams.
- These relays come with a clear & easy-to-read display for quick monitoring and diagnostics.
Frequently Asked Questions
What is the operating temperature range of these relays?
-20 to 55 degrees C.
How to install these relays?
- Ensure that you have the necessary tools and equipment for installation.
- Select an appropriate location for the relay that meets the specified environmental conditions and has sufficient clearance for ventilation and access to the wiring.
- Mount the relay using the mounting brackets or rails provided, ensuring that it is securely fastened and level.
- Connect the power supply and other external devices to the relay, such as sensors and actuators, using the appropriate wiring and connectors.
- Configure the relay using the programming interface and software provided by Eaton or compatible third-party software.
- Test the relay's functionality to ensure that it is operating as expected.
- Once the relay is installed and configured, monitor its performance regularly to ensure that it continues to function properly.
How do I clean Eaton easy 700 Series programmable relays?
- Turn off the power supply to the relay and unplug any connected cables.
- Use a soft & dry cloth to gently wipe the surface of the relay to remove any loose dust or debris.
- For more stubborn debris or stains, use a slightly dampened cloth with a mild and non-abrasive cleaning solution.
- Avoid using harsh chemicals or abrasive materials to prevent damage to the surface of the relay or its components.
- Dry the relay thoroughly with a clean, dry cloth before reconnecting any cables or powering it back on.
We are here to help!
Looking for a part not listed here?
Explore More
- BAILEIGH INDUSTRIAL
- DIVERSITECH
- KEYSHAFT
- TRERICE
- ELKAY PLASTICS
- 12 Volt Accessories
- Morse Taper Extension Sockets
- Copper Foil Rolls
- Hazardous Location Safety and Disconnect Switches
- Grid Coupling
- Blasting Helmet Domes - ALLEGRO SAFETY
- DBT Series Digital Solar-Powered Bimetal Thermometers - DWYER INSTRUMENTS
- Saran Maintenance Free Hoods - ALLEGRO SAFETY
- Center Reamers, 3-Flute - KEO
- ANVIL 2121 Series Plugs, Forged Steel, Round Head
- Two Cable End Fittings - GORLITZ
- Rotor Blades - WESTWARD
- Hard Hat Liners - CONDOR
- MUELLER INDUSTRIES 1601-C Chexter Check Valves